

SSH Tunnel
How to connect Streamkap to databases through an SSH tunnel, covering bastion host setup, ed25519 key configuration, and both Linux and Windows hosts.
SSH bastion is a jump server (or gateway server) that gives access to databases within a private network using the SSH protocol.
How to connect via SSH Tunnel
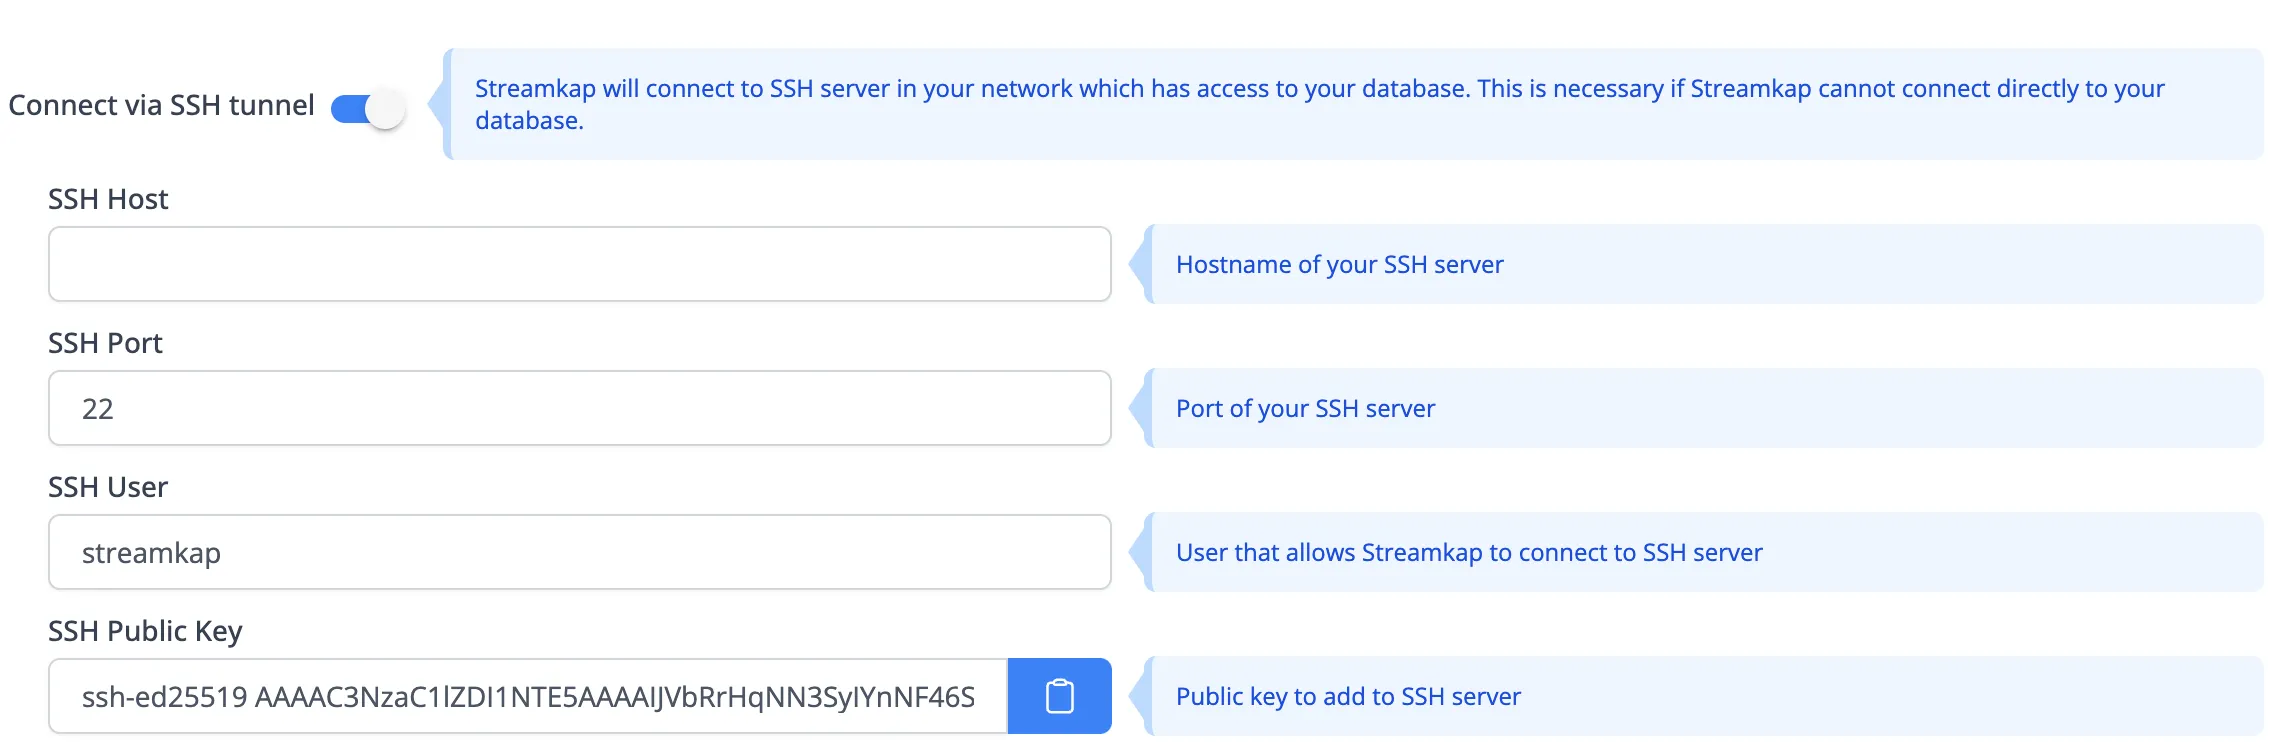
- When setting up a connector, choose to Connect via SSH Tunnel.
- Copy the unique SSH Public Key
- Setup a Streamkap user on your bastion host
- Add the ssh-ed25519 key to the streamkap user on the bastion host
- Add Streamkap IP Addresses to your allowed hosts.
- Input bastion address into SSH Host
- Input the username into SSH User
Why ssh-ed25519 keys vs RSA?
The Ed25519 algorithm has superior security characteristics and computational efficiency.
- Robust Security: The Ed25519 algorithm is based on elliptic curve cryptography (ECC), providing a high level of security with a 128-bit security level. It offers strong resistance against brute force attacks, making it highly suitable for protecting your remote access credentials.
- Smaller Key Size: Ed25519 keys are smaller than their RSA counterparts, reducing the storage and transmission overhead. Smaller keys also contribute to faster authentication times, improving overall connection speeds.
- Fast Key Generation: Generating Ed25519 keys is faster compared to traditional RSA keys
How to Setup a Bastion Host
Setup Linux SSH Host
Log in to your SSH tunnel host and run the following commands:
-- Create group streamkap:
sudo groupadd streamkap

  -- Create user streamkap:
sudo useradd -m -g streamkap streamkap

-- Switch to the Streamkap user:
sudo su - streamkap

-- Create the .ssh directory:
mkdir ~/.ssh
-- Set permissions:
chmod 700 ~/.ssh

-- Change to the .ssh directory:
cd ~/.ssh

  -- Create the authorized_keys file:
touch authorized_keys

-- Set permissions:
chmod 600 authorized_keys

-- Using the key given to you from Streamkap, add this to the authorized_keys file.
echo "<key>" >> ~/.ssh/authorized_keys

-- Set the SSH daemon configuration for Port Forwarding:

sudo nano /etc/ssh/sshd_config
AllowTcpForwarding yes

-- Restart the SSH Service
sudo systemctl restart sshd
Once the user is created, you’ll need to allow IP and port access in these two locations
- Streamkap IP to your tunnel server’s SSH port. See Streamkap IP Addresses
- Your SSH tunnel server to your connector IP and Port
Setup Windows SSH Host
Log in to your SSH tunnel host and run the following commands:
  -- Create user streamkap:

net user streamkap <password> /add /comment:"Streamkap User" /passwordchg:no /passwordreq:no /logonpasswordchg:no

-- Create group streamkap:

net localgroup streamkap-group /comment:"Streamkap Group" /add

-- In Windows command prompt, switch to the SSH server directory.

cd C:\\ProgramData\\ssh\\ && start notepad .\\sshd_config

-- Allow password authentication for the Streamkap user.

PasswordAuthentication yes

-- Allow the Streamkap user to connect to the SSH server. Add the following line to the sshd_config file.

AllowUsers streamkap

-- If your Windows build is 1809 or later, comment out the following lines in the sshd_config file:
# Match Group administrators
# AuthorizedKeysFile **PROGRAMDATA**/ssh/administrators_authorized_keys

Save the sshd_config file.

-- Restart the agent and the sshd service. If the following command fails, you can restart from the Task Manager (Alt + Ctrl + Delete).

Restart-Service ssh-agent; Restart-Service sshd
-- Go into the SSH server using Windows VM.
ssh streamkap@<DNS Name>
-- Create an .ssh folder in your home directory.
mkdir .ssh
- Add an authorized_keys file if it does not exist
-- If your client is Windows PowerShell:
type nul > authorized_keys
echo <streamkap-public-key> >> authorized_keys
icacls C:\\Users\\streamkap\.ssh\\authorized_keys /inheritance:r
-- If your client is Linux:
touch authorized_keys
chmod 600 authorized_keys
echo <streamkap-public-key> >> authorized_keysIf you’re running PowerShell in elevated mode, your setup is complete.
If you’re not running PowerShell in elevated mode, follow the instructions below.
-- Allow public key authentication
PubkeyAuthentication yes

-- Remove password authentication.
PasswordAuthentication no
PermitEmptyPasswords no
Save the sshd_config file.
Verify that inheritance has been disabled and remove Administrator.
- Right click on the
authorized_keysfile - Select Properties
- Select the Security tab
- Select Advanced
- Verify that the bottom left reads Enable Inheritance, which means that inheritance is disabled
- Remove Administrator from the file security permissions.
Restart the agent and the sshd service.
Restart-Service ssh-agent; Restart-Service sshd