> ## Documentation Index
> Fetch the complete documentation index at: https://docs.streamkap.com/llms.txt
> Use this file to discover all available pages before exploring further.
# MongoDB Atlas
> MongoDB Atlas Change Data Capture Setup with Streamkap
## Prerequisites
* MongoDB version ≥ 5.0
* A MongoDB user with sufficient privileges to create database users and collections
## MongoDB Atlas Setup
### 1. Grant Database Access
* Configure one of the [Connection Options](/connection-options) to ensure Streamkap can reach your database.
### 2. Create Database User
#### MongoDB Atlas
* Log in to MongoDB Atlas and navigate to the MongoDB cluster.
* In the left-hand navigation menu, go to **Security > Database Access**.
* Click **New Database User**.
* Choose the password authentication method.
* Enter the username and password for the new Streamkap user (e.g. `streamkap_user`).
* In the **Database User Privileges** drop-down menu, select **Grant Specific User Privileges**.
* Under **Specific Privileges**, add the following roles/privileges:
* `readAnyDatabase`
* `read` on the `local` database
* Click **Add User**.
#### MongoDB Shell
* Using MongoDB Shell, connect to your primary node or replica set.
* Create a user for Streamkap using the script below. Replace password with your choice.
```bash Shell theme={null}
use admin
db.createUser({
user: "streamkap_user",
pwd: "{password}",
roles: [ "readAnyDatabase", {role: "read", db: "local"} ]
})
```
### 3. Enable Snapshots
To backfill your data, the Connector needs to be able to perform snapshots. See [Snapshots & Backfilling](/snapshots) for more information.
You will need to create the collection and give necessary permissions to the `streamkap_user`. The Connector will use this collection for managing snapshots.
This collection can exist in a different database (on the same MongoDB cluster) to the database Streamkap captures data from.
The examples below use `streamkap_signal` as the signal collection name, but you can choose any name. During [Streamkap Setup](#3-snapshot-settings), provide the full path to your signal collection in `database.collection` format (e.g., `streamkap.streamkap_signal`).
#### MongoDB Atlas
* Navigate to the MongoDB cluster.
* Navigate to **Collections** and create a new collection in the database by clicking the `+` button next to the database name.
* Name the collection `streamkap_signal`.
* Give the Streamkap user permissions to `readWrite` on the `streamkap_signal` collection.
* Return to the **Database User Privileges** drop-down menu, select **Grant Specific User Privileges**.
* Under **Specific Privileges**, add the following roles/privileges: `readWrite@{database}.streamkap_signal`
#### MongoDB Shell
```bash Shell theme={null}
db.createCollection("streamkap_signal")
db.grantRolesToUser("streamkap_user", [
{ role: "read", db: "{database}" },
{ role: "readWrite", db: "{database}", collection: "streamkap_signal" }
])
```
### 4. Heartbeats
MongoDB uses change streams to track changes. While change streams use resume tokens to track position, these tokens can expire or become invalidated—particularly on clusters with high write activity or when using custom aggregation pipelines that filter events.
Heartbeats ensure the Connector receives regular change events, keeping resume tokens fresh and providing liveness monitoring.
There are two layers of heartbeat protection:
#### Layer 1: Connector heartbeats (enabled by default)
The Connector periodically emits heartbeat messages to an internal topic, even when no actual data changes are detected. This keeps offsets fresh and prevents staleness.
No configuration is necessary for this layer; it is automatically enabled. We recommend keeping this layer enabled for all deployments.
#### Layer 2: Source database heartbeats (recommended)
**Why we recommend configuring Layer 2**
Layer 2 is especially important when:
* Your database has low or intermittent traffic
* You use custom aggregation pipelines that filter out many events
* You need reliable liveness monitoring
We recommend configuring Layer 2 for all deployments to provide additional resilience.
You can configure regular updates to a dedicated heartbeat collection in the source database. This simulates activity, ensuring change events are generated consistently and resume tokens remain valid.
Since the MongoDB Connector doesn't write directly to the database, you must configure a scheduled job to generate artificial traffic. For MongoDB Atlas, use [Atlas Scheduled Triggers](https://www.mongodb.com/docs/atlas/app-services/triggers/scheduled-triggers/).
Create a collection to store heartbeat documents. This can be in the same database you're capturing or a dedicated `streamkap` database.
**Using MongoDB Atlas UI:**
1. Navigate to your cluster and click **Browse Collections**
2. Click **Create Database** or select an existing database
3. Create a collection named `streamkap_heartbeat`
**Using MongoDB Shell:**
```javascript theme={null}
use streamkap
db.createCollection("streamkap_heartbeat")
```
Ensure the Streamkap user has `read` access to the heartbeat collection.
**Using MongoDB Atlas UI:**
1. Go to **Security > Database Access**
2. Edit the `streamkap_user`
3. Under **Specific Privileges**, add: `read@streamkap.streamkap_heartbeat`
**Using MongoDB Shell:**
```javascript theme={null}
db.grantRolesToUser("streamkap_user", [
{ role: "read", db: "streamkap" }
])
```
1. In MongoDB Atlas, go to **App Services** (or **Triggers** in the left menu)
2. Click **Create a Trigger**
3. Select **Scheduled** trigger type
4. Configure the trigger:
* **Name**: `streamkap_heartbeat_trigger`
* **Schedule Type**: Basic
* **Repeat once by**: Minute
* **Every**: 1 minute(s)
5. In the **Function** section, select **Function** and create a new function:
```javascript theme={null}
exports = async function() {
const serviceName = "mongodb-atlas"; // Your cluster service name
const database = "streamkap";
const collection = "streamkap_heartbeat";
const coll = context.services
.get(serviceName)
.db(database)
.collection(collection);
const result = await coll.updateOne(
{ _id: "heartbeat" },
{
$set: {
last_update: new Date()
}
},
{ upsert: true }
);
console.log(`Heartbeat updated: ${JSON.stringify(result)}`);
return result;
};
```
6. Click **Save**
**Atlas App Services usage and cost**
The scheduled trigger counts as an [App Services Request](https://www.mongodb.com/docs/atlas/app-services/billing/#requests). With a 1-minute interval:
* \~1,440 requests/day (60/hour × 24 hours)
* **Daily free tier**: 50,000 requests—this heartbeat uses only \~3% of the free allowance
* **Cost if exceeding free tier**: \$0.000002 per request
The heartbeat has minimal impact on your App Services usage quota.
### 5. Obtain Connection String
You'll need the connection string for setting up the Connector in Streamkap.
#### MongoDB Atlas
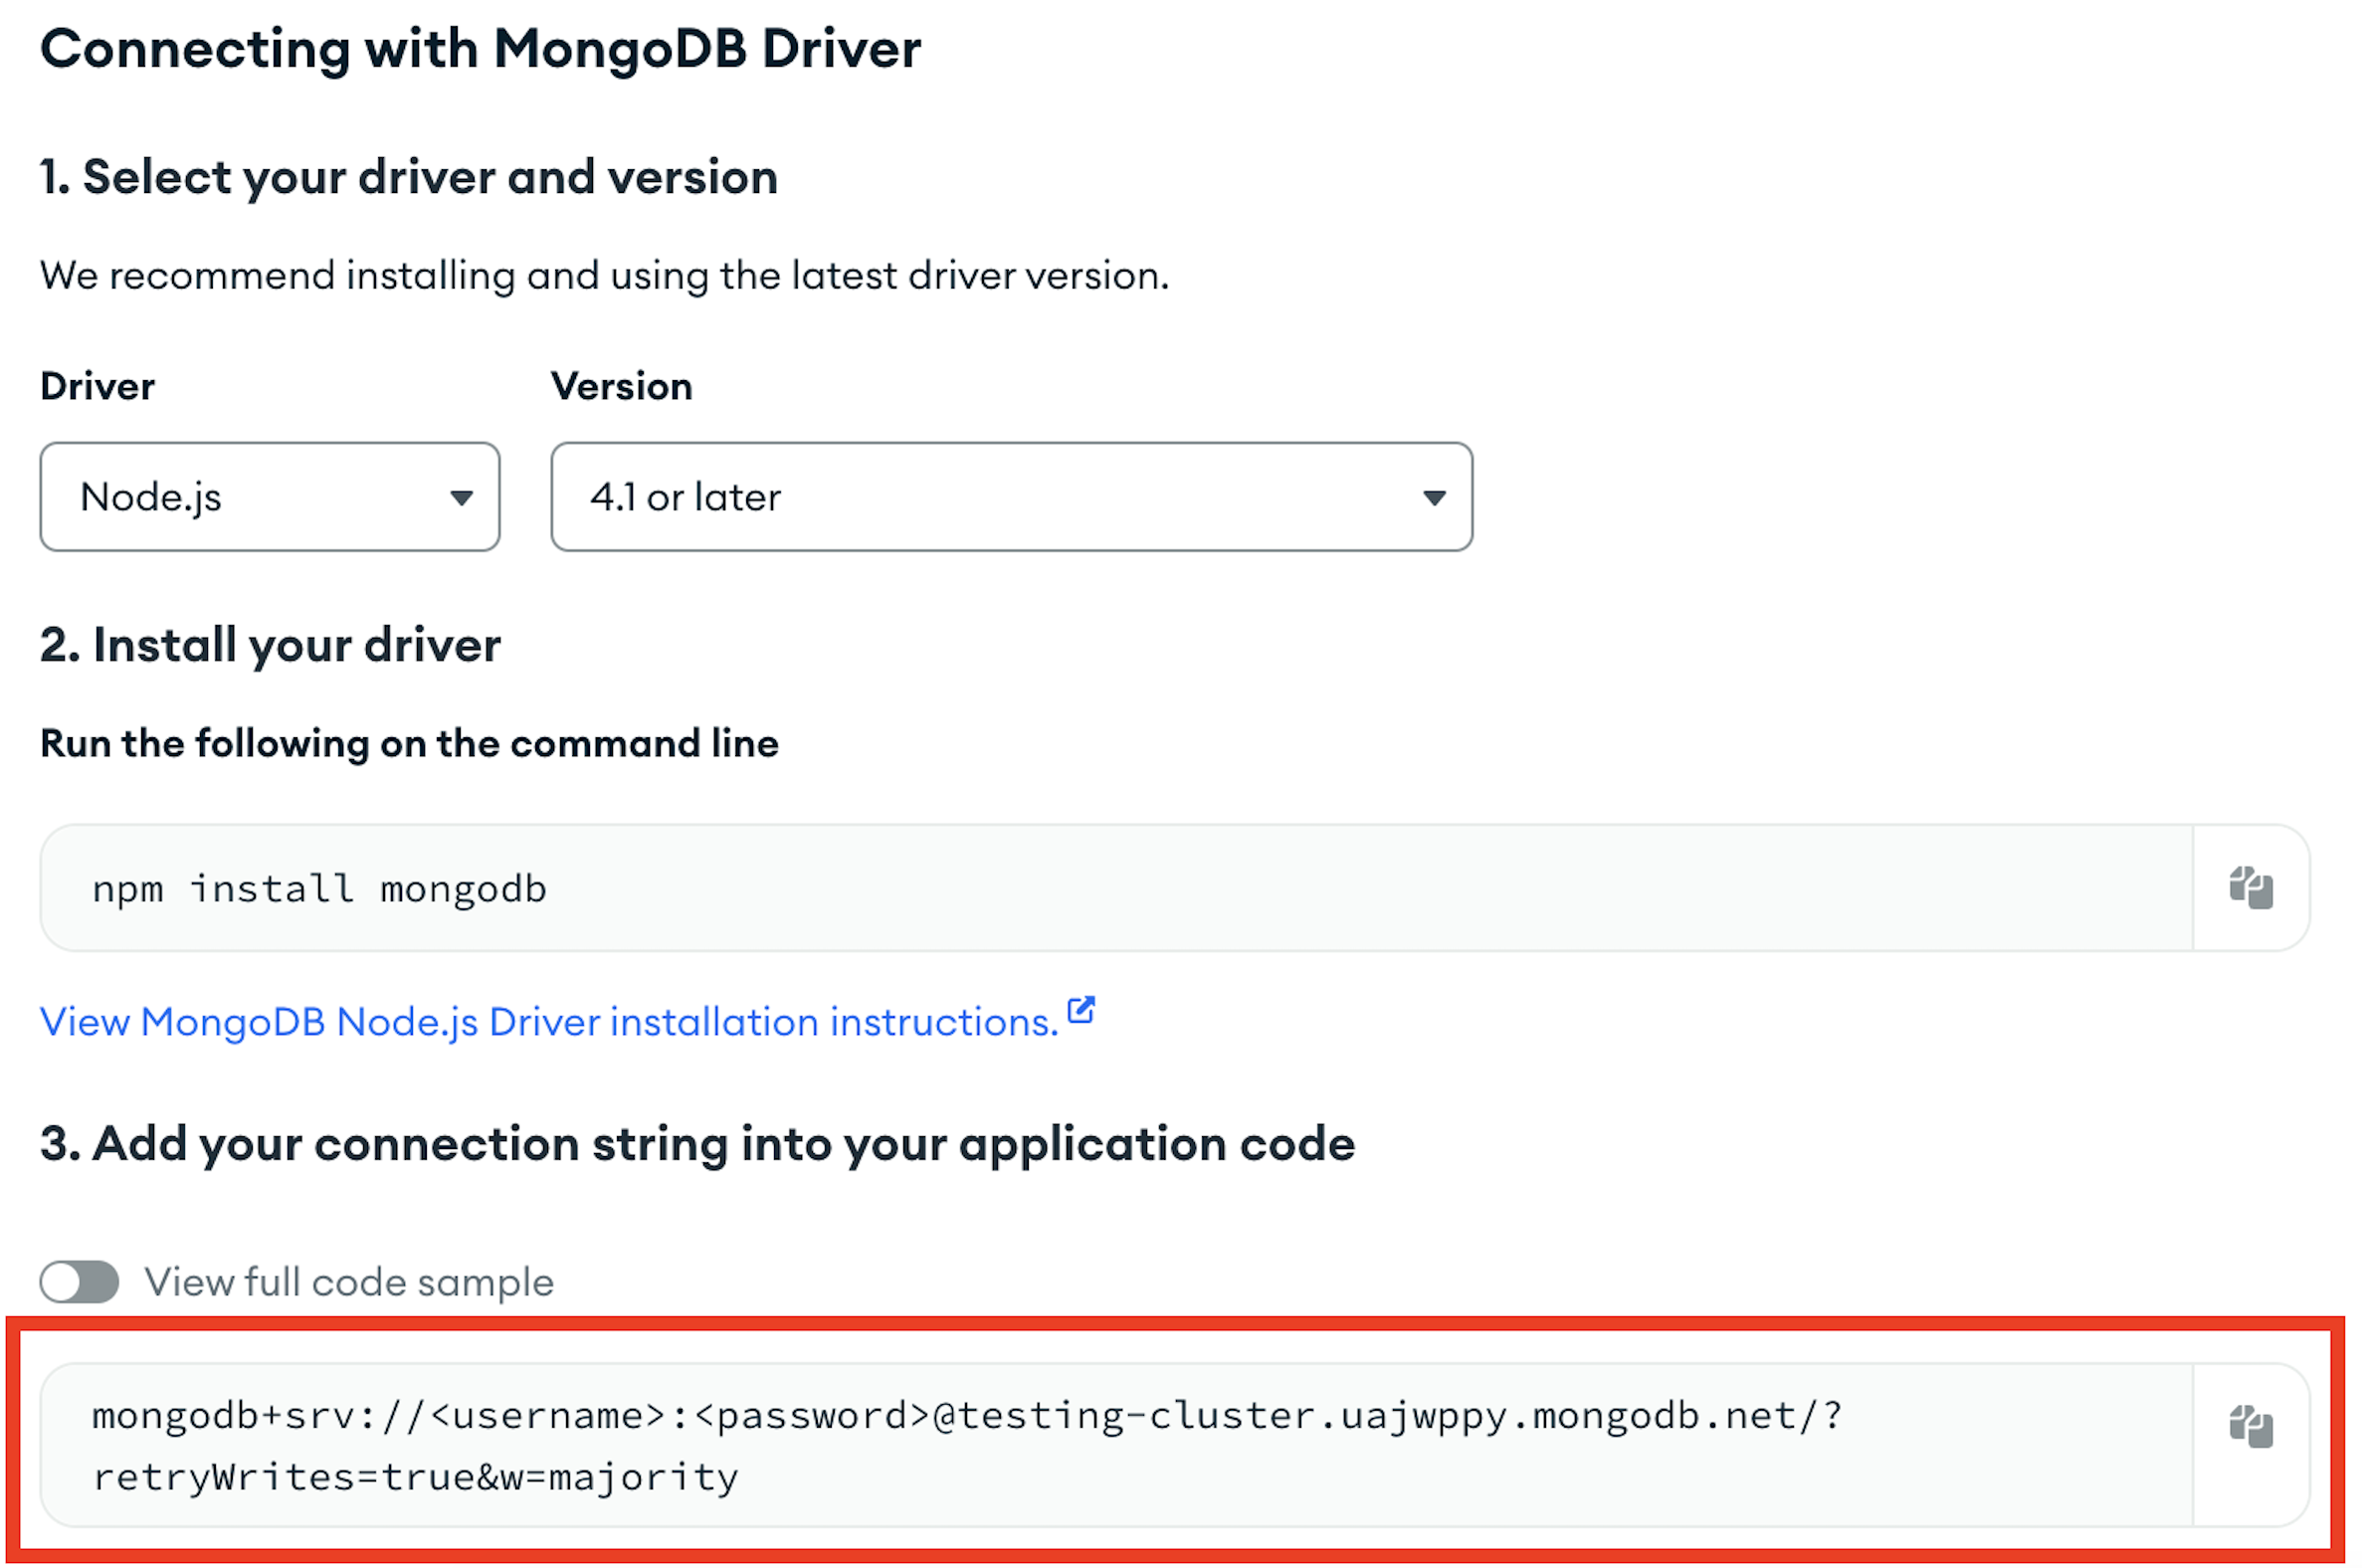
* Log in to MongoDB Atlas and navigate to the cluster to which Streamkap should connect.
* Click **Connect**.
 * Click **Connect your Application**.
 * Copy the connection string.
 #### MongoDB Shell
* Connect to your replica set or primary node using the MongoDB shell as an Admin user.
* Run `db.getMongo()` method to return your connection string.
* We recommend the connection string have the following parameters. They will be added automatically if not included:
* `w=majority`
* `readPreference=primaryPreferred`
For information on accepted connection string formats, please see [MongoDB - Connection String Formats](https://www.mongodb.com/docs/manual/reference/connection-string/#connection-string-formats)
***
## Streamkap Setup
Follow these steps to configure your new connector:
### 1. Create the Source
* Navigate to [Add Connectors](https://app.streamkap.com/connectors/add?tab=Sources).
* Choose **MongoDB**.
* Select **MongoDB Atlas**.
### 2. Connection Settings
* **Name**: Enter a name for your connector.
* **Connection String**: Copy the connection string from earlier steps but replace username and password in the string with the one you created earlier.
* **Array Encoding**: Specify how Streamkap should encode MongoDB array types. `Array` encodes them as a JSON array but requires all elements in the arrays to be of the same type e.g. array of integers. `Array_String` encodes them as a JSON string and must be used if the MongoDB arrays have mixed types.
* **Nested Document Encoding**: Specify how Streamkap should encode nested documents. `Document` encodes them as JSON objects but may be problematic for complex (e.g. multiple levels of nested sub documents and arrays, sub arrays of nested documents) documents. `String` encodes them as a JSON string and we recommend it if the MongoDB nested documents are complex.
* **Connect via SSH Tunnel**: The Connector will connect to an SSH server in your network which has access to your database. This is necessary if the Connector cannot connect directly to your database.
* See [SSH Tunnel](/ssh-tunnel) for setup instructions.
### 3. Snapshot Settings
* **Signal Collection**: Full path to the signal collection including database and collection name (e.g., `streamkap.streamkap_signal`). This collection is used for incremental snapshotting. See [Enable Snapshots](#3-enable-snapshots) for setup instructions.
### 4. Database and Collection Capture
* **Add Database/Collections**: Specify the database(s) and collection(s) for capture.
* You can bulk upload here. The format is a simple list of databases and collections, with each entry on a new row. Save as a `.csv` file without a header.
* If you configured Layer 2 heartbeats, include the heartbeat collection (e.g., `streamkap.streamkap_heartbeat`). See [Heartbeats](#4-heartbeats) for setup instructions.
Click **Save**.
**Have questions?** See the [MongoDB Source FAQ](/mongodb-source-faq) for answers to common questions about MongoDB sources, troubleshooting, and best practices.
#### MongoDB Shell
* Connect to your replica set or primary node using the MongoDB shell as an Admin user.
* Run `db.getMongo()` method to return your connection string.
* We recommend the connection string have the following parameters. They will be added automatically if not included:
* `w=majority`
* `readPreference=primaryPreferred`
For information on accepted connection string formats, please see [MongoDB - Connection String Formats](https://www.mongodb.com/docs/manual/reference/connection-string/#connection-string-formats)
***
## Streamkap Setup
Follow these steps to configure your new connector:
### 1. Create the Source
* Navigate to [Add Connectors](https://app.streamkap.com/connectors/add?tab=Sources).
* Choose **MongoDB**.
* Select **MongoDB Atlas**.
### 2. Connection Settings
* **Name**: Enter a name for your connector.
* **Connection String**: Copy the connection string from earlier steps but replace username and password in the string with the one you created earlier.
* **Array Encoding**: Specify how Streamkap should encode MongoDB array types. `Array` encodes them as a JSON array but requires all elements in the arrays to be of the same type e.g. array of integers. `Array_String` encodes them as a JSON string and must be used if the MongoDB arrays have mixed types.
* **Nested Document Encoding**: Specify how Streamkap should encode nested documents. `Document` encodes them as JSON objects but may be problematic for complex (e.g. multiple levels of nested sub documents and arrays, sub arrays of nested documents) documents. `String` encodes them as a JSON string and we recommend it if the MongoDB nested documents are complex.
* **Connect via SSH Tunnel**: The Connector will connect to an SSH server in your network which has access to your database. This is necessary if the Connector cannot connect directly to your database.
* See [SSH Tunnel](/ssh-tunnel) for setup instructions.
### 3. Snapshot Settings
* **Signal Collection**: Full path to the signal collection including database and collection name (e.g., `streamkap.streamkap_signal`). This collection is used for incremental snapshotting. See [Enable Snapshots](#3-enable-snapshots) for setup instructions.
### 4. Database and Collection Capture
* **Add Database/Collections**: Specify the database(s) and collection(s) for capture.
* You can bulk upload here. The format is a simple list of databases and collections, with each entry on a new row. Save as a `.csv` file without a header.
* If you configured Layer 2 heartbeats, include the heartbeat collection (e.g., `streamkap.streamkap_heartbeat`). See [Heartbeats](#4-heartbeats) for setup instructions.
Click **Save**.
**Have questions?** See the [MongoDB Source FAQ](/mongodb-source-faq) for answers to common questions about MongoDB sources, troubleshooting, and best practices.